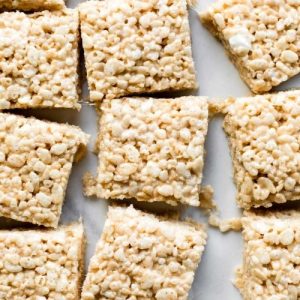
Crispy & Chewy Rice Krispie Treats
These easy, no-bake Rice Krispie Treats are soft, chewy, and perfectly sweet. Made with buttery marshmallows and crispy cereal, they’re ready in minutes and set quickly for a convenient snack or dessert. Ideal for meal prep, parties, or a simple homemade treat.
Equipment
- 9×13-inch baking pan
- Parchment paper
- Large pot (or Dutch oven)
- silicone spatula
- Flat spatula
Ingredients
- ¾ cup 170g; 12 Tbsp unsalted butter
- 2 bags 10 oz each / 566g total mini marshmallows
- ½ teaspoon pure vanilla extract
- Pinch of salt about 1/8 teaspoon
- 9 cups 270g crispy rice cereal
Instructions
- Prepare Your Pan: Begin by lining a 9×13-inch baking pan with parchment paper. Ensure the paper covers the bottom and sides completely so the treats can be lifted out easily later. Lightly grease the parchment with a thin layer of nonstick spray or butter. This step prevents sticking while making it easier to remove the treats in one piece once set.
- Melt the Butter: Place a large pot (or a Dutch oven) on the stove over medium heat. Add 3/4 cup of unsalted butter. Allow it to melt slowly, stirring occasionally, so it doesn’t burn. You’re aiming for smooth, fully melted butter that will form the base for the marshmallow mixture.
- Combine with Marshmallows: Once the butter is fully melted, add two 10-ounce bags of mini marshmallows to the pot. Stir constantly with a silicone spatula as the marshmallows begin to soften and melt. Be patient—this process can take a few minutes. Keep the heat at medium to prevent scorching. Stir until the mixture is completely smooth and shiny, with no marshmallow lumps remaining.
- Add Flavor Enhancers: Remove the pot from heat immediately to prevent overcooking. Add 1/2 teaspoon of pure vanilla extract and a small pinch of salt (slightly less than 1/8 teaspoon). Stir thoroughly to incorporate. The vanilla adds a warm, rich aroma, while the salt balances the sweetness and enhances the overall flavor.
- Fold in the Cereal: Pour 9 cups of crispy rice cereal into the marshmallow mixture gradually. Using a silicone spatula, gently fold the cereal into the melted marshmallow. Work carefully to ensure each piece of cereal is evenly coated. Avoid vigorous stirring that could crush the cereal and make the treats dense. Aim for a light, airy texture with evenly coated cereal.
- Transfer to the Pan: Once the cereal is fully incorporated, transfer the mixture into the prepared baking pan. Use a silicone spatula to spread it out evenly, filling the corners and edges of the pan. Don’t pack the mixture too firmly; a gentle, even layer is enough to shape the treats.
- Press and Smooth: Lightly grease the back of a flat spatula with a tiny amount of butter or nonstick spray. Use it to gently press and smooth the top of the mixture. Pressing lightly helps the treats hold together without compressing them too much, preserving their soft, chewy texture.
- Allow to Set: Leave the treats at room temperature to set for at least 1 hour. This allows the marshmallow to firm up and bind the cereal properly. You can cover the pan with a clean kitchen towel if you want to protect them from dust while setting. Avoid refrigerating, as it may change the texture.
- Lift and Cut: Once fully set, use the edges of the parchment paper to lift the entire block of Rice Krispie Treats out of the pan. Place it on a cutting board. Using a sharp knife (lightly greased if needed), cut into squares or rectangles of your preferred size. Clean the knife between cuts to maintain neat edges.
- Store or Serve: Serve immediately for the freshest, chewiest texture, or store leftovers at room temperature in an airtight container for up to 3 days. For layering, place parchment or wax paper between layers to prevent sticking. These treats can also be frozen for up to 2 months in a freezer-safe container with parchment layers, then thawed at room temperature before serving.
Notes
- Use light greasing on the pan to prevent sticking without adding excess fat.
- Stir marshmallows constantly while melting to avoid burning and ensure smooth consistency.
- Avoid pressing the mixture too hard into the pan to keep treats soft and chewy.
- Treats can be cut into squares, rectangles, or fun shapes using cookie cutters.
- A small pinch of salt enhances flavor without overpowering sweetness.
- Room temperature setting ensures optimal chewy texture; refrigeration can make them firmer than desired.
- Optional: Add mix-ins like chocolate chips, sprinkles, or peanut butter for variety.