Easy & Delicious No Knead Artisan Bread
This No Knead Artisan Bread is a minimalist baker’s dream—requiring only four pantry staples and zero kneading. Its appeal lies in the perfect contrast between a golden, crackly crust and an airy, tender crumb, achieved with virtually no effort.
Equipment
- 1 Large Mixing Bowl – for combining ingredients and letting the dough rise
- 1 Dutch Oven (5–6 qt) – for baking the bread and creating steam
- 1 Bench Scraper or Spatula – for shaping and folding the dough
- 1 Sheet of Parchment Paper – to prevent sticking in the Dutch oven
- 1 Cooling Rack – to cool the bread after baking
Ingredients
- 3 cups + 2 tablespoons 390g all-purpose flour – plus extra for shaping the dough
- 1½ teaspoons sea salt
- ½ teaspoon instant dry yeast – also known as quick-rise yeast
- 1½ cups 354ml warm water – ideally between 120°F and 130°F (hot but not boiling)
Instructions
- Mix Dry Ingredients: In a large mixing bowl, combine the flour, salt, and instant yeast. Stir well using a whisk or fork to evenly distribute the ingredients throughout the flour.
- Add Warm Water and Stir: Slowly pour the warm water into the bowl. Use a silicone spatula or wooden spoon to stir the mixture until a shaggy, sticky dough forms. It’s normal if it looks rough and lumpy—no kneading is required. Make sure all dry flour is incorporated.
- Cover and Let Rise: Cover the bowl with plastic wrap or a damp kitchen towel. Let it sit undisturbed in a warm, draft-free area for about 3 hours. During this time, the dough will expand significantly and develop visible bubbles on the surface.
- Prepare for Shaping: After the rise, lightly flour a clean work surface and your hands. Also, prepare a large bowl lined with parchment paper. Gently scrape the dough from the bowl onto the floured surface using a sturdy spatula or bench scraper. It will be very soft and sticky.
- Shape the Dough: Sprinkle the top of the dough with a little flour. Gently fold the dough toward the center 5–7 times to create a more compact, rounded shape. Tuck in the edges underneath as needed to form a smooth ball. Avoid over-handling to retain the airiness.
- Second Rest: Transfer the shaped dough onto the parchment paper inside the second bowl. Cover again and let it rest for 30 minutes while you preheat the oven.
- Preheat the Dutch Oven: Place your Dutch oven with the lid on inside your oven and preheat to 450°F (230°C). Let it heat fully for the entire 30-minute dough rest. This ensures the pot is hot enough to help the bread rise and form a crispy crust.
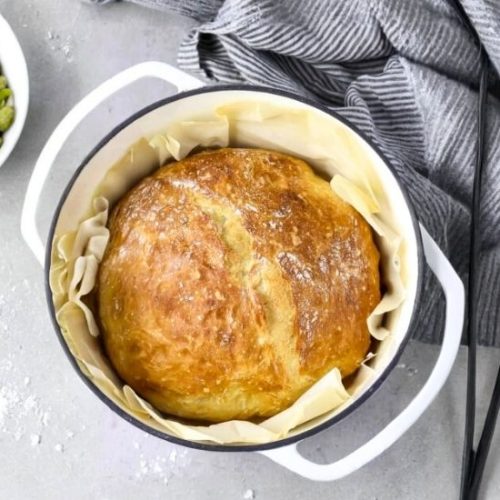
- Bake the Bread: Carefully remove the hot Dutch oven from the oven. Use the parchment paper to lift the dough and gently lower it into the pot. If the parchment sticks out too far, trim the excess to prevent burning. Cover with the lid and bake for 30 minutes.
- Uncover and Finish Baking: After 30 minutes, remove the lid and bake for an additional 8 to 12 minutes, or until the crust turns deep golden brown. Keep an eye on it in the final minutes to prevent overbrowning.
- Cool Before Slicing: Transfer the bread to a wire rack and allow it to cool completely—at least 45 minutes—before slicing. This step helps set the texture and prevents gumminess.
Notes
- Measuring Flour Accurately: For best results, spoon flour into your measuring cup and level it off with a flat edge. Avoid scooping directly from the bag, as it can pack the flour and throw off the balance.
- Water Temperature Matters: Use water that is hot to the touch but not scalding—between 120°F and 130°F. Water that is too hot can kill the yeast.
- Yeast Options: You can substitute active dry yeast for instant, but you'll need to use ¾ teaspoon total. Dissolve it in ¼ cup warm water with a pinch of sugar and let it foam for 5–8 minutes before adding it to the dough. Reduce the remaining water to 1¼ cups.
- No Dutch Oven? A heavy oven-safe pot with a tight lid (ceramic or cast iron) works well too. Just confirm it’s safe at high temperatures.
- Storage Tips: Store the cooled bread in a paper bag or bread box at room temperature for up to 2 days. To refresh the crust, sprinkle with water and bake at 400°F for 5–7 minutes.
- Freezing Instructions: Wrap the whole loaf or individual slices tightly in plastic wrap and freeze for up to 3 months. Reheat in a 350°F oven for 10–15 minutes or toast slices as needed.
