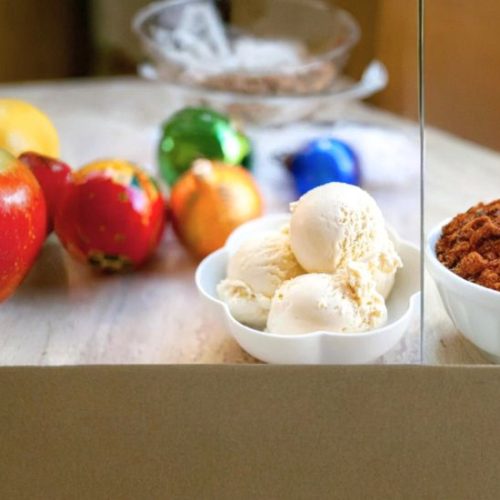
Eggnog Ice Cream
This Eggnog Ice Cream is a creamy, spiced holiday treat made with a custard base and enhanced with a touch of alcohol for added flavor and texture. With notes of cinnamon, nutmeg, and cloves, this rich ice cream channels the comforting essence of traditional eggnog in frozen form. Best enjoyed fresh but keeps beautifully in the freezer, it’s perfect for festive gatherings or as a cozy dessert year-round.
Equipment
- 1 Ice Cream Maker – for churning
- 1 2-Quart Heavy Saucepan – for infusing and heating
- 1 Fine Mesh Strainer – for straining the custard
- 2 Mixing Bowls (metal or glass) – one for ice bath, one for egg yolks
- 1 Silicone Whisk – for tempering eggs
- 1 Airtight Freezer-Safe Container – for storing finished ice cream
Ingredients
- 2 cups heavy whipping cream
- 1 cup whole milk
- 4 whole cloves
- 1 teaspoon freshly grated nutmeg
- ¼ teaspoon ground cinnamon
- Pinch of salt
- ⅔ cup white granulated sugar
- 6 large egg yolks
- 1 teaspoon pure vanilla extract
- 2 tablespoons dark rum bourbon, or brandy (optional but recommended)
Instructions
- Warm and Infuse the Dairy: In a medium-sized heavy-bottomed saucepan, combine 1 cup of the heavy cream with the milk. Stir in the cloves, grated nutmeg, cinnamon, and a small pinch of salt. Gently heat the mixture over medium heat until it begins to steam—avoid letting it boil. Once heated, lower the heat, cover the pan, and allow the mixture to steep for about 30 minutes so the spices can infuse the liquid. Remove and discard the whole cloves.
- Sweeten the Infused Base: Return the pan to low heat and stir in the sugar. Mix well until the sugar fully dissolves, leaving you with a fragrant, sweetened base ready for the eggs.
- Prepare Ice Bath and Strainer Setup: In a large mixing bowl, pour in the remaining 1 cup of heavy cream. Nestle this bowl into a larger one filled with ice water to create an ice bath. Place a fine mesh strainer over the top of the cream to prepare for cooling the custard later.
- Temper the Egg Yolks: In a separate bowl, whisk the egg yolks until smooth. Slowly drizzle about half of the warm cream-milk mixture into the yolks while whisking constantly. This gradual mixing will prevent the yolks from curdling. Once tempered, pour the yolk mixture back into the saucepan.
- Cook and Thicken the Custard: Return the pan to medium heat and stir the mixture continuously with a wooden spoon or silicone spatula. Scrape the bottom and sides often to prevent sticking. Cook until the mixture thickens enough to coat the back of a spoon—this typically takes around 8–10 minutes. You’ll know it’s ready when you can run your finger across the spoon and the line holds.
- Strain and Cool the Custard: Immediately pour the thickened custard through the mesh strainer into the chilled cream in the prepared ice bath. Stir gently to combine and cool the mixture. Let it sit in the ice bath for 10–15 minutes, stirring occasionally, then transfer it to the fridge and chill thoroughly for at least 2 hours, preferably overnight.
- Add Flavor and Churn: Once the custard is fully chilled, stir in the vanilla extract and your choice of spirit (if using). Pour the mixture into your ice cream maker and churn according to the manufacturer’s instructions, usually around 20–25 minutes.
- Freeze Until Firm: Transfer the freshly churned ice cream—which will have a soft-serve texture—to an airtight container. Freeze for 4–6 hours or until firm. If storing longer than a day, let the ice cream sit at room temperature for 5–10 minutes before scooping to soften slightly.
Notes
- Alcohol Tip: The small amount of alcohol enhances both flavor and texture. It helps prevent ice crystals, keeping the ice cream creamy after freezing. However, it can be omitted if you prefer an alcohol-free dessert—just enjoy it the same day for the best texture.
- Don’t Skip the Ice Bath: Quickly cooling the custard helps stop the cooking process and keeps it from over-thickening or scrambling. It also improves the final creaminess.
- Make-Ahead Friendly: This recipe is perfect for preparing a day or two in advance of a holiday gathering. Let it soften a bit before serving for best scoopability.
- Serving Idea: Pair with warm gingerbread cookies, sprinkle with a little extra nutmeg, or top with a splash of espresso for a festive affogato-style dessert.