German Spelt Bread
A quick, wholesome German spelt bread that’s high in fiber, plant-based protein, and low in saturated fat. No proofing needed—just knead, bake, and enjoy a soft, crusty loaf perfect for sandwiches or meal prep.
Equipment
- 1 large mixing bowl
- 1 loaf pan (26 x 12 cm / 10 x 4.5 inch)
- 1 sieve
- 1 rubber spatula
- 1 Pastry Brush
- 1 Serrated Knife
- Stand mixer with dough hook (optional)
Ingredients
- 7 g ¼ oz dry yeast
- 1 tablespoon sugar
- 400 ml 1 ½ cups lukewarm water
- 500 g 3 cups spelt flour (or whole grain spelt flour)
- 1 tablespoon sea salt
- 1 tablespoon apple cider vinegar
- 1 teaspoon olive oil for greasing the pan
Instructions
- Activate the Yeast: Start by warming 400 ml (1 ½ cups) of water until it is lukewarm—warm to the touch but not hot, around 37–40°C (98–104°F). Pour the water into a medium-sized bowl. Add 7 g (¼ oz) dry yeast and 1 tablespoon sugar. Stir gently to dissolve the yeast and sugar completely. Cover the bowl loosely with a kitchen towel or plastic wrap and let it rest for about 10 minutes. You’ll know the yeast is ready when it becomes frothy and bubbly on the surface, signaling it’s alive and active.
- Prepare the Flour Mixture: While the yeast is activating, sift 500 g (3 cups) of spelt flour into a large mixing bowl. You can use regular spelt flour or whole grain spelt flour, or even a 50:50 combination for a heartier texture. Add 1 tablespoon sea salt to the flour and whisk gently to distribute it evenly.This ensures the salt does not come into direct contact with the yeast, which could inhibit its activity.
- Combine Ingredients: Once the yeast mixture is bubbly, pour it into the bowl with the flour and salt. Add 1 tablespoon apple cider vinegar, which will help improve the bread’s rise and add a subtle tangy flavor. Using a dough hook on a stand mixer or your hands, knead the mixture slowly and steadily for about 5 minutes. The dough should be soft, slightly sticky, and elastic but not wet. Avoid overkneading, as this can make the bread dense.
- Prepare the Loaf Pan: Take a 26 x 12 cm (10 x 4.5 inch) loaf pan and lightly grease it with 1 teaspoon olive oil. Alternatively, line it with parchment paper for a no-oil version. Ensure the pan is evenly coated to prevent sticking and to help the loaf form a nice crust.
- Transfer Dough to Pan: Shape the kneaded dough gently into a loaf shape and place it into the prepared pan. Smooth the top lightly with a spatula or your hands. Do not press the dough down too firmly; it should retain its airy structure for optimal rising during baking.
- Cold Oven Start: Place the loaf pan in a cold oven. Set the oven to 200°C (400°F) and allow it to preheat while the dough begins to rise. Starting the dough in a cold oven helps it rise gradually and results in a tender, airy crumb.
- Bake the Bread: Bake the loaf for 50 minutes. Check the bread halfway through to ensure it’s baking evenly; if your oven has hot spots, rotate the pan. The bread should develop a golden-brown crust and a pleasant aroma as it bakes.
- Test for Doneness: Remove the loaf from the oven and carefully lift it from the pan. Tap the bottom of the bread gently; a hollow sound indicates it is fully baked. If it still sounds dense, return it to the oven for an additional 10–15 minutes.
- Optional Extra Crunch: For a crunchier crust, place the loaf directly on the oven rack without the pan and bake for another 10 minutes. Keep an eye on it to avoid over-browning. This step adds a delightful crisp exterior while keeping the inside soft and fluffy.
- Cool Before Slicing: Remove the bread from the oven and place it on a wire cooling rack. Allow it to cool completely before slicing; cutting too early can compress the loaf and make the texture gummy. Cooling ensures the crumb sets properly and the slices hold their shape.
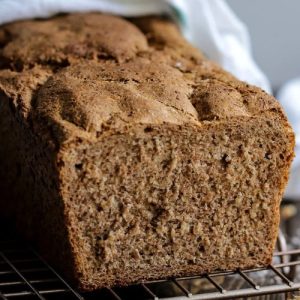
- Serve and Enjoy: Once cooled, slice the bread with a serrated knife for clean edges. Use it for sandwiches, toast, or as a side for soups and stews. This versatile, nutritious loaf is perfect for everyday meals and meal prep.
Notes
- This spelt bread rises in the oven, so no proofing time is needed.
- Knead gently for about 5 minutes—overkneading can make the loaf dense.
- For a crispier crust, remove the bread from the pan after baking and return it to the oven for 10 more minutes.
- Tap the bottom of the loaf to check doneness; a hollow sound indicates it’s ready.
- Let the bread cool completely on a wire rack before slicing to preserve texture.
- You can mix whole grain and regular spelt flour in a 50:50 ratio for a heartier loaf.
- Optional mix-ins include seeds, nuts, or soaked grains for added flavor and nutrition.
