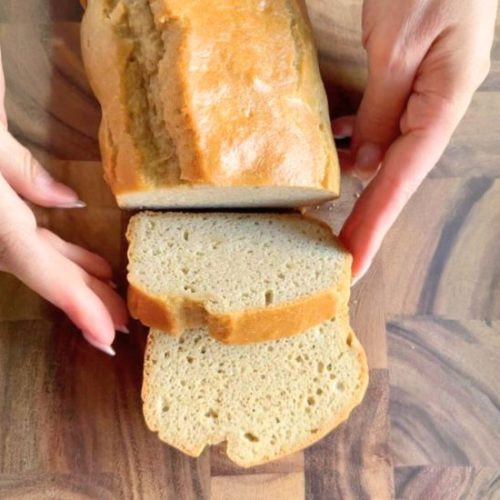
Healthy Almond Flour Bread
A simple, wholesome, and protein-packed almond flour bread that’s naturally gluten-free, low-carb, and perfect for everyday meals or meal prep.
Equipment
- 8×4 inch loaf pan
- large mixing bowl
- Whisk
- Parchment paper
- Cooling Rack
Ingredients
- 5 large eggs
- 5 tablespoons olive oil or melted butter or coconut oil
- 1 tablespoon maple syrup
- 1 teaspoon apple cider vinegar
- 1¾ cups superfine almond flour
- ½ teaspoon baking soda
- ¼ teaspoon salt
Instructions
- Preheat the Oven: Begin by preheating your oven to 350°F (175°C). Proper preheating is essential to ensure the bread rises evenly and achieves a golden, slightly crisp crust. Place the oven rack in the center position for optimal heat circulation.
- Prepare the Loaf Pan: Line an 8×4 inch loaf pan with parchment paper. Ensure the paper fully covers the bottom and sides of the pan, leaving a slight overhang to make lifting the bread out effortless once baked. This step prevents sticking and guarantees a smooth removal.
- Beat the Eggs: In a large mixing bowl, lightly beat the eggs using a whisk until the yolks and whites are fully combined. Aim for a smooth, slightly frothy texture.This aerates the eggs, contributing to a tender, fluffy crumb in the final loaf.
- Incorporate Wet Ingredients: Whisk in the olive oil (or melted butter/coconut oil), maple syrup, and apple cider vinegar. Make sure the mixture is smooth and uniform.The vinegar is a crucial step—it reacts with the baking soda to give the bread a proper rise, so do not skip this ingredient.
- Add Dry Ingredients: Gradually add the superfine almond flour, baking soda, and salt to the wet mixture. Stir gently but thoroughly until a thick, uniform batter forms. Take care not to overmix; the batter should be smooth but dense, typical of almond flour-based breads.
- Transfer Batter to Pan: Pour the batter into the prepared loaf pan, spreading it evenly with a spatula. Gently tap the pan on the counter to remove any large air bubbles and ensure the surface is level, which promotes even baking and a beautiful, uniform loaf.
- Bake to Perfection: Place the loaf in the preheated oven and bake for 30–35 minutes. Check for doneness by inserting a toothpick into the center—it should come out clean or with a few moist crumbs. The top should be golden brown and slightly firm to the touch.
- Initial Cooling in Pan: Remove the loaf from the oven and let it cool in the pan for 10 minutes. This short rest allows the bread to firm up slightly, making it easier to remove without breaking or crumbling.
- Transfer to Cooling Rack: Lift the bread from the pan using the parchment overhang and place it on a cooling rack. Allow it to cool completely for another 20 minutes. Proper cooling prevents the bread from becoming soggy and helps it slice neatly.
- Slice and Serve: Once fully cooled, use a sharp serrated knife to slice the bread to your desired thickness. Enjoy it plain, toasted, as a sandwich base, or topped with avocado, nut butter, or a drizzle of honey for a satisfying breakfast or snack.
- Storage for Freshness: Store any leftovers in an airtight container in the refrigerator for up to a week, or slice and freeze portions individually for longer-term storage. Reheat slices as needed for toast or sandwiches.
Notes
- Best enjoyed sliced and lightly toasted to enhance texture and flavor.
- Store leftovers in an airtight container in the refrigerator to maintain freshness.
- Slices can be wrapped individually and frozen for up to a month.
- Substitute apple cider vinegar with white wine vinegar if needed, but do not omit.
- Use superfine almond flour for the smoothest texture; coarser varieties may yield a denser loaf.
- Adjust baking time slightly for higher altitude or different oven calibrations.