Healthy Sourdough Rye Bread
A flavorful, rustic sourdough rye bread combining rye, bread, and whole wheat flours with a naturally fermented sourdough starter. This loaf offers a delicious crust, tender crumb, and complex, tangy notes, perfect for everyday use and meal prep.
Equipment
- 1 Dutch oven with lid
- 1 Banneton proofing basket (or bowl with towel)
- 1 Bench scraper
- 1 Razor blade lame (or sharp knife)
- 1 Digital Kitchen Scale
Ingredients
- 295 grams 1 1/4 cups water
- 227 grams 1 cup active sourdough starter
- 120 grams 1 cup rye flour
- 350 grams 2 1/2 cups bread flour
- 75 grams 1/2 cup whole wheat flour
- 8 grams 1 1/2 teaspoons salt
- 17 grams 1 tablespoon molasses
- 2 teaspoons caraway seeds
Instructions
- Preparing an Active Starter: Begin by feeding your sourdough starter 4 to 12 hours before you plan to make the dough. This ensures the starter is fully active and bubbly, which is essential for proper fermentation and rise. To feed, mix equal parts flour and water into your starter and keep it at room temperature until it doubles in size and shows plenty of bubbles on the surface. You can test its readiness by dropping a spoonful into water—it should float, indicating strong activity.
- Combining Ingredients for the Dough: In a large mixing bowl, combine 295 grams (about 1 1/4 cups) of water, 227 grams (1 cup) of your active sourdough starter, 120 grams (1 cup) rye flour, 350 grams (2 1/2 cups) bread flour, 75 grams (1/2 cup) whole wheat flour, 8 grams (1 1/2 teaspoons) salt, 17 grams (1 tablespoon) molasses, and 2 teaspoons caraway seeds. Mix all the ingredients thoroughly until there are no dry patches of flour. The molasses adds subtle sweetness and depth, while caraway seeds contribute a classic rye bread aroma.
- Autolyse Rest Period: Cover the bowl with a damp towel, plastic wrap, or a lid to prevent drying out, and let the dough rest for 30 minutes. This step, known as autolyse, hydrates the flour fully and helps gluten development begin naturally. It makes the dough easier to handle and improves the final bread texture.
- Stretch and Fold Technique: To develop strength and structure in the dough, perform stretch and folds in the bowl. For the first 45 minutes, do three sets approximately every 15 minutes: wet your hand to prevent sticking, reach under the dough, gently stretch it upwards, then fold it over the top.Rotate the bowl slightly and repeat this four times to complete one cycle. This process strengthens gluten without kneading and encourages a nice rise.
- Final Stretch and Fold Cycles: After the initial three stretch and folds, let the dough rest for 30 minutes, then perform three additional stretch and folds spaced 30 minutes apart. These final folds further develop dough strength and improve elasticity, critical for a good crumb and oven spring.
- Bulk Fermentation: Cover the dough with a wet towel or plastic wrap and leave it to bulk ferment at room temperature until it roughly doubles in size. This can take up to 12 hours depending on your kitchen’s temperature and starter vigor. Monitor carefully to avoid over-fermentation, which can weaken the dough and impact flavor negatively.
- Shaping the Dough into a Ball: Once bulk fermentation is complete, gently turn the dough out onto a lightly floured surface. Shape it into a tight ball by cupping your hands around it and spinning it gently toward you. This tightening builds surface tension, helping the dough hold its shape during proofing and baking.
- Developing the Dough Skin: Set the shaped dough ball on the counter, uncovered, for 15 to 20 minutes. This resting period allows a thin, slightly dry skin to form on the dough’s surface, which aids in scoring and shaping during the next step.
- Final Shaping of the Boule: After the skin develops, turn the dough over so the seam is on top. Fold the two sides inward to meet in the middle, then fold the other two sides similarly, creating a tighter seam on the underside. This step reinforces the loaf’s shape and ensures an even crumb structure.
- Proofing in a Banneton or Bowl: Transfer the shaped dough seam-side up into a well-floured banneton basket or a bowl lined with a floured kitchen towel. Cover it loosely with plastic wrap, a shower cap, or a plastic bag to prevent drying. Place the dough in the refrigerator for a slow, cold proof lasting 12 to 15 hours. This cold fermentation deepens flavor complexity and helps with dough handling.
- Preparing the Oven and Dutch Oven: About one hour before baking, preheat your oven to 475°F (246°C) with your Dutch oven inside to heat thoroughly. The heavy pot traps steam released during baking, which is essential for achieving a crisp, caramelized crust and good oven spring.
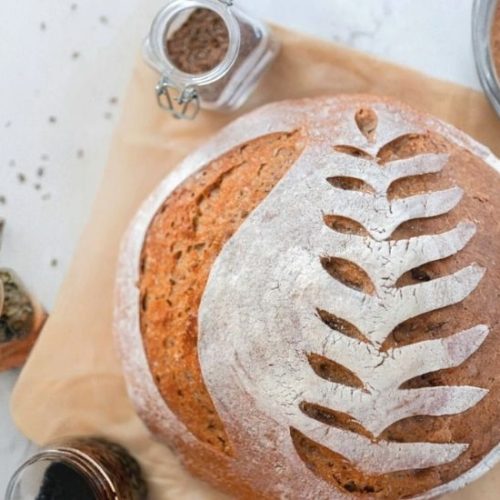
- Removing Dough and Scoring: When ready to bake, remove the dough from the refrigerator immediately and carefully invert it onto a piece of parchment paper, seam-side down. Optionally, dust the top with flour to highlight your scoring design. Using a razor blade or lame, score the dough quickly and confidently with a shallow cut—this controls how the bread expands in the oven and creates an attractive pattern.
- Baking Covered: Place the dough on the parchment into the hot Dutch oven and cover it with the lid. Bake covered for 20 minutes, which traps steam and allows the crust to develop without hardening too quickly.
- Baking Uncovered for Crust Development: After 20 minutes, carefully remove the lid to expose the loaf directly to oven heat. Continue baking for another 20 minutes or until the crust turns a deep golden brown and sounds hollow when tapped.
- Cooling the Bread: Once baked, transfer the bread to a wire rack and allow it to cool completely before slicing. Cooling lets the crumb set properly and prevents gummy textures. Patience here ensures the best texture and flavor experience.
Notes
- Use an active, bubbly sourdough starter for best fermentation and rise.
- Freshly milled rye flour intensifies flavor, but store-bought rye flour works well too.
- Avoid over-fermenting during bulk rise to prevent dough collapse and sour off-flavors.
- Scoring the dough just before baking controls expansion and adds a beautiful crust design.
- Cold proofing overnight in the fridge improves flavor depth and dough handling.
- Use a Dutch oven to create steam for a crispy crust and tender crumb.
