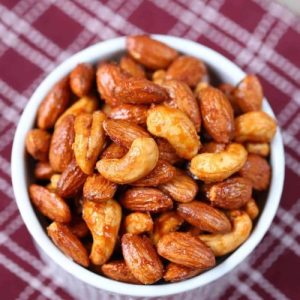
Maple Sriracha Roasted Nuts
A quick, crunchy, and flavor-packed snack, these Maple Sriracha Roasted Nuts combine sweet maple syrup, spicy sriracha, and a hint of salt. Rich in protein, fiber, and healthy fats, they’re perfect for a satisfying treat or meal-prep snack that’s ready in under 20 minutes.
Equipment
- 1 large mixing bowl
- 1 small bowl
- 1 Baking Sheet
- Parchment paper or nonstick silicone mat
- Whisk or spoon
Ingredients
- 2 cups unsalted nuts almonds, cashews, pecans, walnuts, pistachios, or a mix
- 3 tablespoons maple syrup
- 2 tablespoons sriracha
- ½ teaspoon kosher salt
Instructions
- Preheat the Oven: Begin by setting your oven to 375°F (190°C). Preheating is essential for even roasting, which ensures that every nut gets that perfect golden-brown color and rich, toasted flavor. While the oven warms up, prepare your baking sheet to prevent the nuts from sticking and make cleanup easier.
- Prepare the Baking Sheet: Line a baking sheet with either parchment paper or a nonstick silicone mat. This will create a smooth surface for roasting and prevent the nuts from burning or sticking to the tray. Make sure the sheet is large enough to spread the nuts in a single layer, allowing them to roast evenly.
- Measure and Mix the Nuts: In a large mixing bowl, add 2 cups of unsalted nuts. You can choose a single type of nut, like almonds, or mix varieties such as cashews, pecans, walnuts, and pistachios. A mix of different nuts gives your snack a richer texture and flavor profile. Gently shake the bowl to loosen the nuts, ensuring they’re ready to coat evenly.
- Whisk the Maple Sriracha Glaze: Take a small bowl and combine 3 tablespoons of maple syrup, 2 tablespoons of sriracha, and ½ teaspoon of kosher salt. Use a whisk or fork to blend the ingredients thoroughly until smooth. The maple syrup adds natural sweetness, the sriracha contributes a spicy kick, and the salt balances the flavors perfectly. Taste the mixture and adjust the spice if desired—more sriracha for heat or more maple for sweetness.
- Coat the Nuts: Pour the prepared maple-sriracha mixture over the nuts in the large bowl. Using a spoon or spatula, toss the nuts until each one is fully coated with the sticky, flavorful glaze. Make sure the coating is even so that every bite has a perfect balance of sweet, spicy, and salty flavors.This step ensures maximum flavor absorption during roasting.
- Spread Nuts on Baking Sheet: Transfer the coated nuts to the lined baking sheet. Using a spatula or the back of a spoon, spread them out in a single layer, making sure no nuts overlap or clump together. Proper spacing allows heat to circulate evenly around each nut, producing a uniform roast and preventing any pieces from burning.
- Roast the Nuts: Place the baking sheet in the preheated oven. Roast for 10–12 minutes, checking occasionally to ensure they don’t overcook. The nuts should turn light golden brown and smell fragrant. Keep in mind that nuts continue to cook slightly after being removed from the oven, so it’s better to slightly under-roast than over-roast.
- Cool and Separate Nuts: Once roasted, remove the baking sheet from the oven and let the nuts cool for 15 minutes at room temperature. As they cool, the glaze will harden slightly, giving them a delicious crunchy texture. Use your hands or a spatula to break apart any nuts that are stuck together, ensuring each piece is separate and easy to serve.
- Serve or Store: Transfer the cooled nuts to a serving dish for immediate enjoyment, or place them in an airtight container if storing. These nuts can be kept at room temperature for several days, making them perfect for meal prep or snacking throughout the week. They’re ideal for topping salads, mixing into yogurt, or enjoying straight from the bowl.
- Optional Adjustments: For a spicier snack, add extra sriracha before roasting. If you prefer a sweeter profile, drizzle a little more maple syrup. Using salted nuts? You can skip the kosher salt to prev
Notes
- If using salted nuts, skip the added kosher salt.
- Adjust the spice level by adding more or less sriracha to suit your taste.
- Swap maple syrup with honey or agave nectar if preferred.
- Spread nuts in a single layer for even roasting and crispiness.
- Keep an eye on the oven—nuts roast quickly and can burn if left too long.
- Cooling time is important—it helps the glaze firm up and gives the nuts a crunchy texture.
- Use a silicone baking mat for easy cleanup and to prevent sticking.
- Great for meal prep—make a batch ahead for weekly snacking.
- These nuts make a perfect gift idea when packaged in jars or bags.
- Try mixing different nuts for variety in flavor, crunch, and nutrition.
