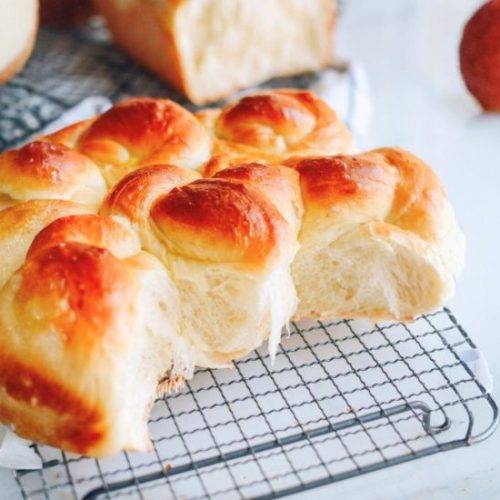
Milk Bread
Soft, buttery, and fluffy Asian-style milk bread made with heavy cream, milk, and yeast, perfect for breakfast or sandwiches.
Equipment
- 1 Stand mixer with dough hook attachment
- 2 Loaf pans or 2 Round baking pans (9-inch)
- 1 Pastry Brush
- 1 Kitchen thermometer (optional)
- 1 Damp kitchen towel (for proofing)
Ingredients
- ⅔ cup heavy cream room temperature
- 1 cup milk plus 1 tablespoon room temperature (whole, 1%, or 2%)
- 1 large egg room temperature
- ⅓ cup granulated sugar
- 4 cups all-purpose flour or substitute 1/2 cup cake flour plus 3 1/2 cups bread flour
- 1 tablespoon active dry yeast instant yeast can be used as well
- 1 ½ teaspoons salt
- 1 egg for egg wash
- 1 teaspoon water for egg wash
- 1 tablespoon granulated sugar
- 1 tablespoon hot water for simple syrup
Instructions
- Combine and Knead the Dough: In the bowl of a stand mixer fitted with a dough hook, pour in the heavy cream, milk, and whole egg. Add the sugar, flour (or flour blend), yeast, and salt on top. Turn the mixer to the lowest setting to combine ingredients, then gradually increase to medium speed. Knead the dough for about 15 minutes, stopping occasionally to scrape down the sides and press the dough together. The dough should be slightly sticky but pull away from the bowl’s edges. If it clings too much, sprinkle an extra tablespoon of flour and continue kneading. For hand kneading, extend the kneading time to around 20–25 minutes for the same smooth texture.
- First Rise (Proofing): Cover the dough with a damp cloth and place it in a warm, draft-free area. Allow the dough to rise until it doubles in volume, which will take approximately 1 to 2 hours. To create a warm proofing environment, you can place the covered bowl inside an off microwave with a cup of hot water nearby.
- Prepare Baking Pans: While the dough proofs, butter two loaf pans or round baking pans (9-inch diameter) thoroughly on all sides to prevent sticking and help with even baking.
- Shape the Dough: Once risen, return the dough to the mixer and knead it gently for 5 minutes to release any trapped air. Turn the dough onto a lightly floured surface and divide it into two equal parts. For loaves, shape each piece into a rough rectangle, then slice each rectangle into three equal portions. Place these pieces neatly side by side in each prepared loaf pan. Alternatively, divide each half into eight equal balls or ropes for rolls or buns, and arrange them in round pans as desired. Cover again with a damp cloth and let them rise for another hour.
- Bake the Bread: Preheat the oven to 350°F (175°C) and position a rack in the center. Just before baking, whisk together one egg and a teaspoon of water to create an egg wash. Gently brush this over the tops of the risen dough for a golden, glossy finish. Bake the bread for 23 to 25 minutes or until the crust is a deep golden brown and the bread sounds hollow when tapped.
- Add Shine and Sweetness: Immediately after removing the bread from the oven, prepare a simple syrup by dissolving one tablespoon of sugar into one tablespoon of hot water. Brush this syrup lightly over the warm bread to add a subtle shine and sweet flavor. Let the bread cool before slicing.
Notes
- This recipe does not require activating the yeast beforehand. Adding yeast directly with the other ingredients saves time and simplifies the process.
- You can mix and match flours: using cake flour with bread flour improves softness while maintaining structure.
- For a softer crust, cover the baked bread with a clean towel as it cools.
- Store the bread in an airtight container at room temperature for up to 3 days or freeze for longer storage.
- If you don’t have a stand mixer, kneading by hand works perfectly fine; just add extra kneading time.
- The simple syrup glaze adds beautiful shine and keeps the crust tender — don’t skip this finishing touch!