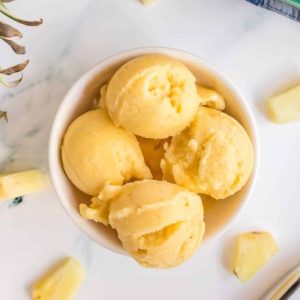
Pineapple Ice Cream
This no-churn Pineapple Ice Cream is a light, creamy, and refreshing treat made with just three simple ingredients—frozen pineapple, coconut milk, and maple syrup. Naturally dairy-free and vegan, it’s packed with tropical flavor and requires no special equipment beyond a blender. Perfect for summer desserts, meal prep, or a quick healthy indulgence.
Equipment
- 1 high-speed blender or food processor
- 1 9×5-Inch Loaf Pan
- 1 Ice Cream Scoop
Ingredients
- 4 cups frozen pineapple chopped
- 1 cup coconut milk
- ⅓ cup maple syrup
- Optional Topping: 1 cup fresh pineapple diced
Instructions
- Prepare the Ingredients: Begin by gathering all the ingredients: frozen pineapple chunks, coconut milk, and maple syrup. If you haven’t pre-chopped the pineapple before freezing, cut fresh pineapple into small cubes and freeze them until solid. Using frozen fruit is essential—it gives the ice cream its thick, creamy texture without the need for an ice cream maker. Also, measure out the coconut milk and maple syrup in advance for smooth blending.
- Load the Blender or Food Processor: Place the frozen pineapple into a high-speed blender or food processor. Pour in the coconut milk, followed by the maple syrup. The liquid ingredients will help loosen the frozen fruit as it blends, preventing the blades from getting stuck.Using a powerful blender ensures everything combines into a velvety-smooth base.
- Blend the Base Until Smooth: Turn the blender on high speed and let it run for about 45–60 seconds. The mixture will look crumbly and chunky at first—that’s normal. Stop the blender, scrape down the sides with a spatula or use the tamper tool to push the fruit toward the blades. Resume blending for another 30–60 seconds until the mixture transforms into a creamy, thick, soft-serve consistency. The key here is patience—blend until absolutely smooth and luscious.
- Transfer and Smooth the Mixture: Once fully blended, scrape the ice cream base into a 9×5-inch loaf pan. Use a spatula to spread it evenly, smoothing out the top so it freezes uniformly.This step ensures that scooping later will be easier and the ice cream will look neat and professional.
- Freeze the Ice Cream: Cover the loaf pan with plastic wrap or foil to prevent ice crystals from forming. Place it in the freezer for 4–5 hours, or until the ice cream is firm enough to scoop. For the creamiest results, avoid stirring or opening the freezer too often while it sets.
- Soften Before Serving: When you’re ready to enjoy, take the loaf pan out of the freezer and let it sit at room temperature for 5–7 minutes. This short thawing time softens the texture just enough to make scooping easier.To prevent sticking, run your ice cream scoop under hot water, then glide it smoothly through the frozen dessert.
- Add the Final Touch: Scoop the ice cream into bowls or cones. For extra freshness and presentation, top each serving with diced fresh pineapple. The contrast of frozen creaminess with juicy pineapple pieces creates a perfect tropical balance. Serve immediately and enjoy your homemade, dairy-free pineapple ice cream!
Notes
- Use ripe, sweet pineapple for the best flavor—unripe fruit can make the ice cream taste sour.
- Coconut milk from a can (full-fat) gives the creamiest results, while carton coconut milk will make the texture lighter.
- Maple syrup can be replaced with honey, agave, or another natural sweetener, depending on preference.
- To prevent icy texture, always use frozen pineapple chunks and avoid adding ice.
- For extra creaminess, blend longer until the mixture looks silky smooth before freezing.
- If the ice cream feels too hard after freezing, let it sit at room temperature for a few minutes before scooping.
- Adding fresh pineapple as a topping boosts flavor and gives a refreshing bite.
- This recipe is naturally vegan and dairy-free, making it suitable for many dietary lifestyles.
