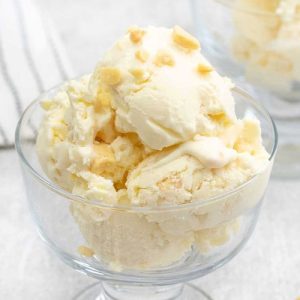
Quick & Creamy Honeycomb Ice Cream
This no-churn honeycomb ice cream is a creamy, crunchy, and irresistible summer dessert. Made with just six simple ingredients, it’s high in protein, easy to prepare, and ready to enjoy in under 4 hours. Perfect for family treats, casual gatherings, or a quick indulgence at home.
Equipment
- 1 large mixing bowl
- (1) Electric Hand Mixer or Stand Mixer with Whisk Attachment
- 1 Measuring Cup
- 1 Measuring Spoon
- 1 Freezer-Safe Container
Ingredients
- 600 ml Heavy cream
- 397 g Sweetened condensed milk
- 1 teaspoon Vanilla bean paste
- ¼ cup Honeycomb crushed
- 150 g White chocolate chips
- 2 tablespoons Maple syrup optional
Instructions
- Prepare the Heavy Cream: Begin by taking 600 ml of cold heavy cream. Make sure it has been refrigerated for several hours or overnight; this ensures the cream whips properly. Pour the cream into a large mixing bowl that is clean and completely dry, as any grease or moisture can prevent it from reaching stiff peaks. Using an electric hand mixer or stand mixer with a whisk attachment, start whipping the cream on medium speed. Gradually increase to high speed as it thickens. Whip until soft peaks form, then continue until stiff peaks appear—this means when you lift the whisk, the cream holds its shape firmly without collapsing. This stage is crucial because it provides the light, airy base that makes your ice cream creamy and smooth.
- Combine the Sweetened Condensed Milk and Flavors: Once your cream is whipped to perfection, gently fold in 397 g of sweetened condensed milk. Condensed milk is key for sweetness and smooth texture, acting as both a sugar source and a stabilizer. Next, add 1 teaspoon of vanilla bean paste for that rich, aromatic flavor, and 2 tablespoons of maple syrup if you prefer a subtle, natural sweetness that complements the honeycomb. Use a spatula to gently fold the ingredients together. Avoid overmixing, as this can deflate the whipped cream and compromise the ice cream’s airy texture. Folding, rather than stirring vigorously, keeps the mixture light while evenly distributing the flavors.
- Add the Crunchy Honeycomb: Now, it’s time to add texture to your ice cream. Take ¼ cup of crushed honeycomb pieces. The honeycomb provides delightful crunch and bursts of natural sweetness, elevating the dessert from creamy to indulgent. Gently fold the honeycomb into the cream mixture using a spatula, making sure every bite will have some honeycomb bits.Be careful not to overfold, which could crush the delicate honeycomb too much. The goal is to maintain both the airy creaminess and the crunchy texture in every spoonful.
- Incorporate White Chocolate Chips: To add an extra layer of indulgence, fold in 150 g of white chocolate chips. White chocolate complements the honeycomb’s sweetness beautifully and melts slightly during freezing, creating tiny pockets of creamy chocolate. Again, use a gentle folding motion with a spatula to ensure even distribution without deflating your whipped cream base. Take care that the chocolate chips are spread throughout the mixture so every serving has a little sweetness in each bite.
- Transfer to Freezer-Safe Container: Once all ingredients are combined, carefully transfer the ice cream mixture into a clean, airtight freezer-safe container. Use a spatula to smooth the top for even freezing. Cover the container with a lid or tightly wrap with plastic wrap to prevent ice crystals from forming. For best results, ensure the container is level in your freezer so the ice cream freezes evenly.
- Freeze Until Set: Place the container in the freezer for at least 3 to 4 hours, or until the ice cream is completely firm. If you prefer, you can leave it overnight for an extra-thick, scoopable texture. Avoid stirring during freezing, as this can alter the cream’s consistency and reduce the desired smoothness. During this time, the flavors will meld together, and the honeycomb will slightly soften, giving each bite a perfect balance of creamy and crunchy textures.
- Serve and Enjoy: When you’re ready to serve, remove the ice cream from the freezer and let it sit at room temperature for 5 minutes to make scooping easier. Use an ice cream scoop or spoon to serve into bowls or cones. Each portion should reveal the crunchy honeycomb pieces and chocolate chips, creating a visually appealing and decadent treat. For an extra touch, sprinkle a few additional crushed honeycomb pieces or chocolate chips on top. Enjoy immediately and savor the creamy texture, sweet honeycomb crunch, and delicate chocolate flavor.
Notes
- Use cold heavy cream for best whipping results.
- Do not overbeat the cream; stiff peaks should form without graininess.
- Fold ingredients gently to maintain a light, airy texture.
- Crushed honeycomb can be adjusted for more or less crunch.
- White chocolate chips add sweetness but can be substituted with dark chocolate if desired.
- Optional maple syrup enhances sweetness naturally; omit if you prefer less sugar.
- Freeze in a flat, wide container for faster, even freezing.
