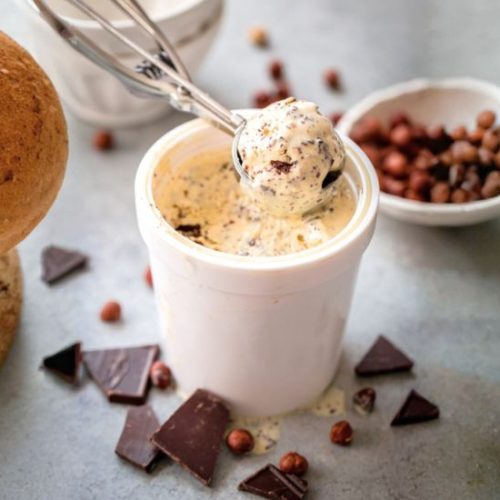
Rich & Nutty Chocolate Hazelnut Ice Cream at Home
A rich and creamy chocolate hazelnut ice cream featuring homemade hazelnut butter and swirls of melted semi-sweet chocolate for decadent flavor and texture.
Equipment
- KitchenAid 5 Qt. Artisan Stand Mixer
- KitchenAid Ice Cream Maker Attachment
- Magimix Food Processor
- Medium saucepan
- Fine Mesh Sieve
- Microwave-Safe Bowl
- Plastic Bag (for drizzling chocolate)
Ingredients
For the Hazelnut Butter:
- 1 cup 5¼ oz raw hazelnuts, skin-on
For the Ice Cream Base:
- 6 pasteurized egg yolks
- ¾ cup 150 g granulated sugar
- 1½ cups 360 mL whole milk
- 1½ cups 350 mL heavy cream
- ½ teaspoon pure vanilla extract
- Small pinch kosher salt
- Homemade hazelnut butter prepared above
For the Chocolate Swirl:
- 2 ounces semi-sweet chocolate chopped
- 1 tablespoon 15 g unsalted butter
Instructions
- Toasting Hazelnuts for Flavor and Texture: Begin by preheating your oven to 350°F (176°C). Prepare a baking sheet by lining it with parchment paper or a silicone baking mat to prevent sticking and ensure even toasting. Spread one cup of raw hazelnuts, skins intact, evenly across the sheet in a single layer. Place the baking sheet in the oven and toast the hazelnuts for 10 to 15 minutes. You’ll know they’re ready when you can smell their fragrant, nutty aroma and the skins start to crack. Keep a close eye to avoid burning. Toasting not only deepens the flavor but also makes the nuts easier to peel.
- Removing the Hazelnut Skins for Smooth Butter: Once toasted, immediately transfer the hot hazelnuts to the center of a large, clean kitchen towel. Fold and gather the towel’s ends tightly to enclose the nuts. Allow them to cool for 5 to 10 minutes, which makes handling easier and prevents burns. Next, use your hands to vigorously rub the hazelnuts inside the towel, loosening and removing most of the papery skins. Some skins may cling stubbornly; if so, spread those nuts back on the baking sheet and return them to the oven for an additional 3 to 5 minutes to help loosen the skins further. Removing the skins is important as it ensures a creamy, smooth nut butter without bitterness.
- Crafting Creamy Homemade Hazelnut Butter: Transfer the peeled hazelnuts to the bowl of a large food processor. Begin processing on high speed. In the first few minutes, the nuts will break down into a dry, crumbly mixture. Pause every few minutes to scrape down the sides of the bowl with a spatula, ensuring all nuts get evenly processed.Continue blending for 3 to 5 minutes, allowing the natural oils to be released gradually. You will notice the texture transform from coarse crumbs into a loose, creamy nut butter. This homemade hazelnut butter is the key to infusing your ice cream with rich, authentic flavor and texture. Set aside.
- Preparing the Custard Base for Richness: In a medium mixing bowl, whisk together six pasteurized egg yolks and ¾ cup granulated sugar. Whisk briskly until the mixture turns thick, smooth, and pale yellow—this step is crucial for achieving a silky custard base. Slowly add 1½ cups whole milk and 1½ cups heavy cream, whisking gently to combine without curdling. Transfer this mixture to a medium saucepan and place over medium-low heat.Stir frequently with a wooden spoon, continuously scraping the bottom and sides of the pan to prevent scorching. The custard is done when it thickly coats the back of the spoon and holds its shape when you swipe your finger through it. This step takes patience but ensures a smooth, luscious ice cream texture.
- Incorporating Flavorful Ingredients into Custard: Immediately remove the saucepan from heat to prevent overcooking.Transfer the hot custard to a large mixing bowl. Add ½ teaspoon pure vanilla extract, a small pinch of kosher salt, and the prepared homemade hazelnut butter. Whisk everything thoroughly until the butter is fully incorporated and the custard has a uniform creamy texture. This combination gives the ice cream its signature nutty and aromatic profile. Allow the mixture to cool to room temperature to prepare for chilling.
- Straining and Chilling for Perfect Texture: Pour the cooled custard through a fine-mesh sieve into a large, refrigerator-safe container. This step removes any lumps or cooked egg bits to ensure a perfectly smooth ice cream base. Cover the container tightly with a lid or plastic wrap, then refrigerate for at least 12 hours, or overnight. The extended chilling not only enhances flavor development but also improves the custard’s texture, making it ideal for churning.
- Preparing the Chocolate Swirl Mixture: As the ice cream base chills, prepare the chocolate swirl that will be added at the end. In a microwave-safe bowl, combine 2 ounces of chopped semi-sweet chocolate with 1 tablespoon unsalted butter. Microwave in 15-second bursts, stirring thoroughly between intervals to avoid overheating. Continue until the mixture is fully melted and smooth. Transfer the warm chocolate to a small plastic bag and squeeze out excess air before sealing.If the chocolate cools and thickens too much before use, place the sealed bag in a bowl of warm water to gently rewarm it during the final churning step.
- Churning the Ice Cream for Creamy Consistency: Attach your ice cream maker to the stand mixer according to the manufacturer’s instructions. Pour the chilled custard base into the ice cream maker bowl. Begin churning the mixture, which aerates the custard and prevents ice crystal formation for a creamy texture. Monitor the process carefully; as the ice cream nears completion, prepare to add the chocolate swirl.
- Adding Chocolate Swirls at the Perfect Moment: During the last few minutes of churning, snip a very small hole in the corner of the plastic bag containing the melted chocolate mixture. Slowly drizzle the warm chocolate in a thin stream directly into the ice cream as it churns. The motion and temperature will create delicate, crunchy chocolate ribbons evenly distributed throughout the ice cream, adding delightful texture and bursts of chocolate flavor in every bite.
- Freezing and Serving Your Homemade Ice Cream: Once churning is complete, promptly transfer the ice cream into an airtight container.To prevent ice crystals forming on the surface, press a layer of parchment paper or plastic wrap directly onto the ice cream before sealing the container with its lid. Freeze the ice cream for at least 4 to 6 hours, or until firm enough to scoop. For an extra touch of texture, consider chopping a handful of toasted, peeled hazelnuts and folding them into the ice cream just before the final freeze. Serve chilled and enjoy the rich, nutty, and chocolatey decadence of this homemade treat.
Notes
- Use raw hazelnuts with skins on for optimal flavor and easier skin removal after toasting.
- Toast hazelnuts evenly by spreading them in a single layer and checking frequently to prevent burning.
- Removing hazelnut skins is key to a smooth, rich nut butter without bitterness.
- Chill the ice cream base thoroughly (12 hours minimum) to improve texture and flavor development.
- Melt chocolate slowly in short bursts to avoid scorching or seizing.
- Drizzle warm chocolate into ice cream during the last churning minutes for delicate chocolate ribbons.
- Optional: Add chopped toasted hazelnuts at the end of churning for extra crunch.
- Store ice cream in an airtight container with parchment or plastic wrap pressed on the surface to prevent ice crystals.
