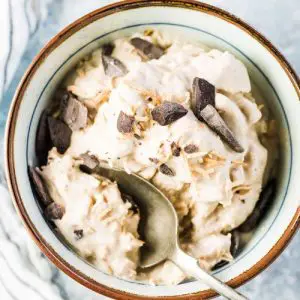
Toasted Coconut Ice Cream
A creamy, dairy-free ice cream made with coconut milk, coconut sugar, and toasted shredded coconut. Naturally sweet, fiber-rich, and filled with healthy fats, this frozen dessert is easy to prepare with or without an ice cream maker. Perfect for everyday indulgence or meal-prep friendly desserts.
Equipment
- 1 Large pan (for toasting coconut)
- 1 Medium saucepan (for heating coconut milk mixture)
- 1 Mixing spoon (for stirring)
- 1 Ice cream maker (optional, for churn method)
- 1 Shallow freezer-safe dish (for no-churn method)
- 1 Fork (for scraping no-churn ice cream)
Ingredients
- 2 cups shredded coconut divided
- 2 cans 14 oz each unsweetened coconut milk (at least 60% extract)
- ½ cup coconut sugar
- 1 tablespoon vanilla extract
- ½ cup chocolate chunks optional, vegan or paleo if needed
Instructions
- Toast the Coconut: Place 2 cups of shredded coconut in a large, dry skillet or frying pan. Set the pan over medium heat. Stir occasionally with a wooden spoon or spatula to ensure even browning. After about 4–6 minutes, the coconut will release a nutty aroma and turn a light golden-brown color. Be careful not to walk away — coconut can burn quickly. Once toasted, remove from heat immediately to prevent over-browning. Set aside.
- Prepare the Coconut Milk Base: In a medium saucepan, combine the unsweetened coconut milk (from 2 cans) and ½ cup of coconut sugar. Warm the mixture gently over medium heat, stirring frequently, until the sugar is completely dissolved. Do not allow the mixture to boil — you only want it heated enough for the sugar to blend smoothly. Once dissolved, remove the pan from heat.
- Add Flavor and Texture: Stir in the vanilla extract and 1 ½ cups of the toasted coconut (reserving the remaining ½ cup for garnish later). Mix well so the coconut pieces are evenly distributed throughout the creamy base. Allow the mixture to cool slightly, then transfer the pan to the refrigerator. Chill for at least 2–3 hours or until the mixture is completely cold. This step is crucial for smooth, creamy ice cream.
- Churn the Ice Cream: nce the base is thoroughly chilled, pour it into your ice cream maker. Process according to your machine’s manufacturer instructions, usually about 20–25 minutes, until it reaches a soft-serve consistency. If you’re adding chocolate chunks, stir them in during the last 5 minutes of churning so they are evenly folded into the mixture.
- Freeze Until Firm: Transfer the churned ice cream into a freezer-safe container with a tight-fitting lid. Smooth the top with a spatula and sprinkle the reserved ½ cup toasted coconut over the surface. Cover and freeze for at least 2–4 hours until firm enough to scoop.
- Freeze the Mixture in a Shallow Dish: Pour the chilled coconut milk mixture into a shallow freezer-safe dish (a glass baking dish works well). Spread it out evenly and place it in the freezer.
- Scrape and Mix for Creaminess: After about 1 hour, remove the dish from the freezer. Using a fork, scrape through the mixture, breaking up any ice crystals and mixing it around. This helps mimic the churning process, giving the ice cream a creamy texture. Return the dish to the freezer.
- Repeat the Process: Continue scraping and stirring every hour for 3–4 hours, or until the mixture reaches a creamy, scoopable consistency. If you’re using chocolate chunks, fold them in after your final scraping before letting the ice cream set completely.
- Serve and Enjoy: When ready to serve, scoop the ice cream into bowls or cones.Garnish each serving with the reserved toasted coconut for extra crunch and flavor. Enjoy immediately, or store covered in the freezer for up to 1 week.
Notes
- For best results, use full-fat coconut milk with at least 60% coconut extract to achieve a creamy texture.
- Toasting the coconut slowly over medium heat enhances its flavor; avoid high heat to prevent burning.
- Coconut sugar can be substituted with maple syrup or agave, though sweetness and texture may vary slightly.
- Chocolate chunks are optional but add a delightful texture contrast. Use vegan or paleo-friendly chocolate if needed.
- If making the no-churn version, scraping and stirring every hour is key to preventing ice crystals and ensuring creaminess.
- Leftover ice cream should be kept in a tightly sealed container to maintain freshness and prevent freezer burn.
- For a richer flavor, try adding a pinch of sea salt to the coconut milk mixture before chilling.
