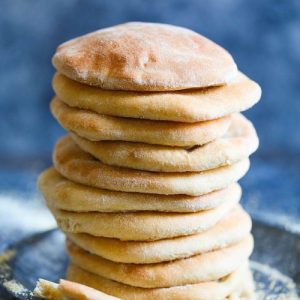
Whole Wheat Pita Bread
Soft, fluffy whole wheat pita bread made from wholesome ingredients. Rich in fiber, plant-based protein, and healthy fats, this homemade bread is perfect for sandwiches, wraps, or dipping.Easy to prepare and bake, it’s an everyday healthy bread option that outshines store-bought versions.
Equipment
- Electric mixer with dough hook
- Large mixing bowls (2)
- Rolling Pin
- Baking sheets (2)
- Parchment paper or silicone baking mats
- Clean kitchen towels
Ingredients
- 1¼ cups warm water 100–110°F
- 1¼- ounce packet active dry yeast
- 1 teaspoon honey
- 1½ cups all-purpose flour
- 1½ cups whole-wheat flour
- ¼ cup extra-virgin olive oil
- 1 teaspoon salt
Instructions
- Activate the Yeast: Start by pouring 1¼ cups of warm water (between 100–110°F) into the bowl of an electric mixer. Sprinkle in the 1¼-ounce packet of active dry yeast, followed by 1 teaspoon of honey. Gently stir to combine. Allow this mixture to rest for about 5 minutes until it becomes frothy and aromatic.This step ensures that the yeast is alive and ready to leaven the bread.
- Combine the Flours: In a large mixing bowl, sift together 1½ cups of all-purpose flour and 1½ cups of whole-wheat flour. Stir thoroughly to ensure the flours are evenly mixed. This combination balances the softness of all-purpose flour with the fiber-rich texture of whole wheat, giving your pita a tender yet wholesome structure.
- Make the Initial Dough: Gradually add about ½ cup of the flour mixture to the foamy yeast mixture. Stir until it forms a smooth, sticky batter. Cover the bowl with a clean kitchen towel and place it in a warm spot for 45 minutes to 1 hour. During this time, the dough will begin to rise and develop a light, airy texture.
- Knead in the Remaining Ingredients: Attach the dough hook to your electric mixer. Slowly add the remaining 2½ cups of flour mixture, about ½ cup at a time, along with ¼ cup of extra-virgin olive oil and 1 teaspoon of salt. Mix on low speed until a soft, cohesive dough forms. Then, increase the speed to medium-high and knead for 3 minutes. The dough should feel elastic, slightly tacky, and spring back gently when pressed.
- First Rise: Lightly oil a large bowl or coat it with nonstick spray. Transfer the kneaded dough to the bowl, turning it over once to coat all sides with a thin layer of oil. Cover with a clean towel and leave in a warm, draft-free spot for 45 minutes to 1 hour, until the dough has doubled in size. This first rise develops flavor and creates the airy structure characteristic of pita bread.
- Shape the Dough: Once the dough has doubled, gently punch it down to release excess air. Transfer it to a lightly floured surface. Divide the dough into 12 equal portions and shape each portion into a smooth, tight ball. This step ensures even baking and consistent puffing in the oven.
- Roll into Circles: Using a rolling pin, flatten each dough ball into a round about 5 inches in diameter. Aim for uniform thickness, around ¼ inch, so the pita puffs evenly while baking.Keep the rounds covered with a towel while working to prevent them from drying out.
- Prepare for Second Rise: Line two baking sheets with parchment paper or silicone baking mats. Arrange the rolled-out dough rounds on the sheets, leaving space between each one. Cover with a clean towel and allow the dough to rest for about 30 minutes. This second rise ensures the pitas puff up perfectly in the oven.
- Preheat the Oven: While the dough is resting, preheat your oven to 475°F (245°C). Position the oven rack in the center to promote even heat distribution.A fully preheated oven is crucial for the pitas to rise quickly and form their signature pocket.
- Bake the Pitas: Place the baking sheets in the preheated oven. Bake for 5–8 minutes, keeping a close eye on the pitas. They should puff fully and turn lightly golden but not brown. Remove them carefully using oven mitts to avoid burns.
- Cool and Serve: Transfer the baked pitas to a wire rack or a clean kitchen towel. Serve warm immediately, or let them cool completely for later use. These pitas are perfect for sandwiches, dips, or as a side to any meal. Store any leftovers in an airtight container to maintain softness.
Notes
- For best results, ensure water temperature is between 100–110°F to activate the yeast properly; water that is too hot may kill the yeast.
- Whole-wheat flour can make the dough slightly denser; combining it with all-purpose flour ensures a soft, fluffy texture.
- Pitas puff best in a very hot oven; preheating for at least 15 minutes is recommended.
- Do not over-flour the dough when rolling; a light dusting is enough to prevent sticking.
- Store leftover pitas in an airtight container at room temperature for up to 2 days, or freeze for longer storage.
